ISO 2493-2 Paper Bending Resistance Tester Supplier
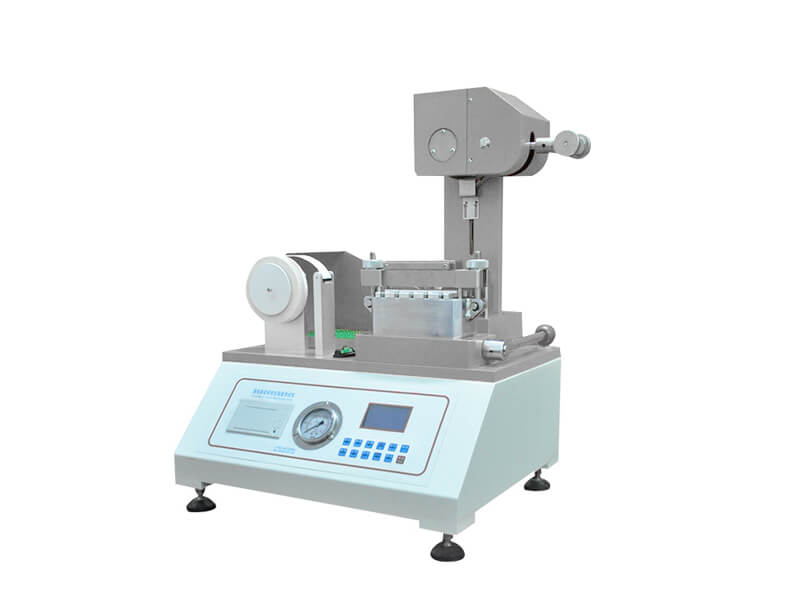
Taber Stiffness Tester is used to determine the bending resistance and resilience of flexible materials with a thickness between 0.1 mm and 5.5 mm, such as paper, board, foil, metal sheets, plastic sheets, rubber sheets, textile sheets, etc. The stiffness value of the test sample is obtained by measuring the bending moment required when the sample clamped at one end is bent to a given angle. Bending resistance value readings taken in the two directions are averaged to give the stiffness of the test piece.
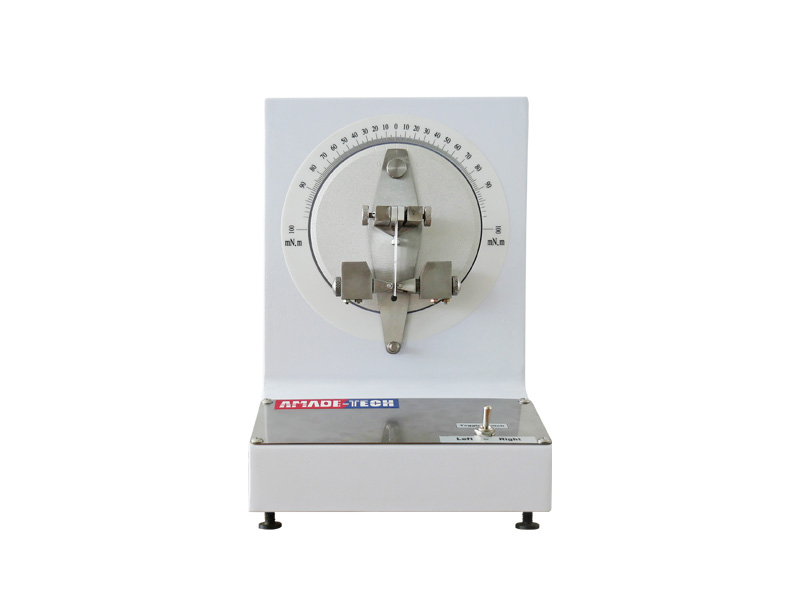
This machine features a constant-speed motor, a free-swinging weighted pendulum with the sample holder, and a power-driven dial. It is composed of a transmission part, a measurement part and a supporting base part. The measuring range of this instrument is 1 ~ 500 mN.m. The whole measuring range is divided into seven ranges, and each range has its own range weight and scaling factor.
Test Standards
ISO 2493-2
TAPPI T489 om-08
Test Principle
The top of the test sample is clamped between the gap of the two clamping blocks, and the lower end is clamped between the two adjustable fastening rollers connected to the driving disc. When the test is started, the constant-speed motor drives the driving disc. The generated torsion acts on the sample through a pair of rollers to push against the test sample and deflect it from its vertical position, causing the pendulum to deflect. When the center line of the pendulum coincides with the 15° line or 7.5° line on the driving disk, immediately flip the switch back to the center and record the reading on the force disk. (If the reading is greater than 90, replace the bottom of the pendulum with a heavier weight. If the reading is less than 10, change to a lighter weight). Then use the same method to deflect the sample in the other direction. After the test sample has been deflected by 15° (or 7 1/2°) to the left and right, the average reading is calculated. Finally, the result is multiplied by a scaling factor.
Technical Parameters
| Model | AT-P8008 |
| Measurement Range | (1 ~ 500) mN.m, divided into 7 small ranges |
| Indication Error | ± 2 % |
| Testing Speed | (200° ± 20°)/ min |
| Rated Bending Angle | 15° ± 0.3° & 7.5° ± 0.3° |
| Sample Size | 38 × 70 mm |
| Dimension | 220 × 230 × 350 mm |
| Net Weight | 15 kg |
| Power Supply | AC 220 V ± 10 %, 50 Hz or Specified |
Features
- Configured with a bi-directional pendulum weighing system as a core part to evaluate the stiffness or resiliency of materials.
- There are 7 test ranges corresponding to 7 weights to fit different samples from extremely lightweight and flexible materials to rigid materials.
- A precision clamping mechanism is adopted to ensure a constant bending length and bending angle.
- Both jaws of the sample clamp are adjustable to accommodate test pieces in different thicknesses.
- Easy to use and maintain.
Request a Quote Now
Please feel free to contact us for more details on the product, price, lead time, payment terms, shipment methods, etc. AmadeTech sales engineers will respond within one working day.


